How To Change Your Mouse Pointer and Make it Bigger in Windows / MAC
Changing your mouse pointer size and style can be a great way to customize your computing experience, especially if you have trouble seeing the default pointer. Here’s how you can do it on different operating systems:
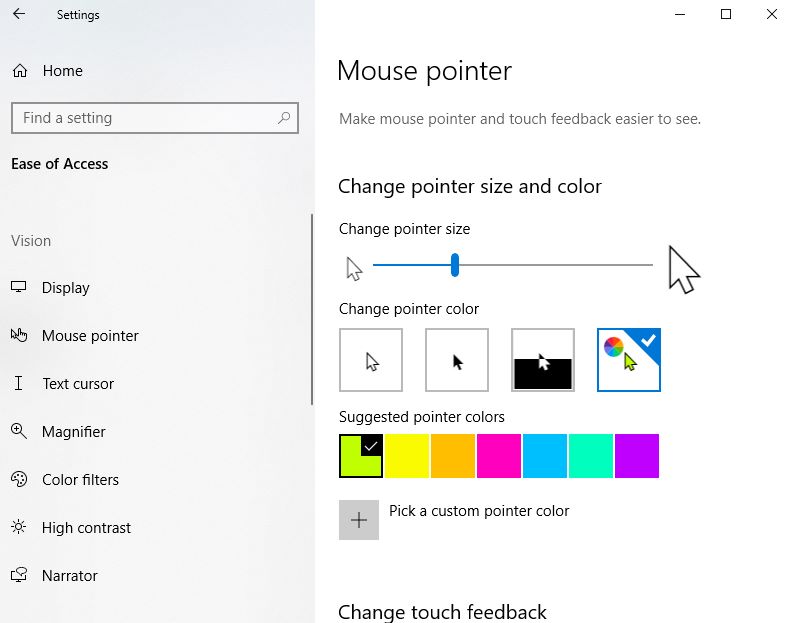
On Windows 10/11:
- Open Settings: You can do this by clicking the Start button and then the gear icon, or by pressing Windows + I on your keyboard.
- Ease of Access / Accessibility Settings: In Windows 10, click “Ease of Access.” In Windows 11, it might be labeled as “Accessibility.”
- Mouse Pointer: Click on “Cursor & pointer” in the pane on the left.
- Change Pointer Size and Color: Here, you’ll see options to change the size of the pointer and its color. You can choose from several preset sizes and colors or customize your own.
On macOS:
- Open System Preferences: Click on the Apple icon in the top-left corner of your screen and select “System Preferences.”
- Accessibility: Click on the “Accessibility” icon.
- Display: In the menu on the left, choose “Display.”
- Cursor: Click on “Cursor” to adjust its size using the slider.
On Ubuntu (GNOME Desktop):
- Open Settings: Click on the system menu at the top-right corner of your screen and choose “Settings.”
- Universal Access: Click on “Universal Access” in the left sidebar.
- Cursor Size: You will find the option to change the cursor size here. Select the size that best fits your needs.
By adjusting these settings, you can make your mouse pointer larger and easier to see, which can help reduce eye strain and improve your ability to navigate your computer.

")
")
")